A life cycle of a star worksheet helps students see how stars change over time in a simple, classroom-friendly way. Most worksheets ask learners to label pictures, put stages in order, or match stage names to diagrams. The best versions use clear visuals and short stage names so students can focus on the big idea: stars are born, grow, change, and end in different ways.
Core Star Stages
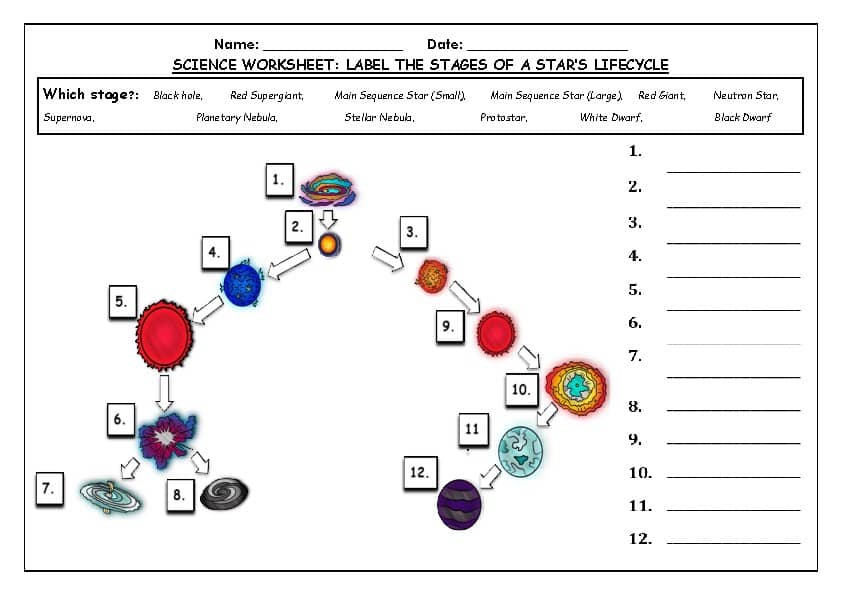
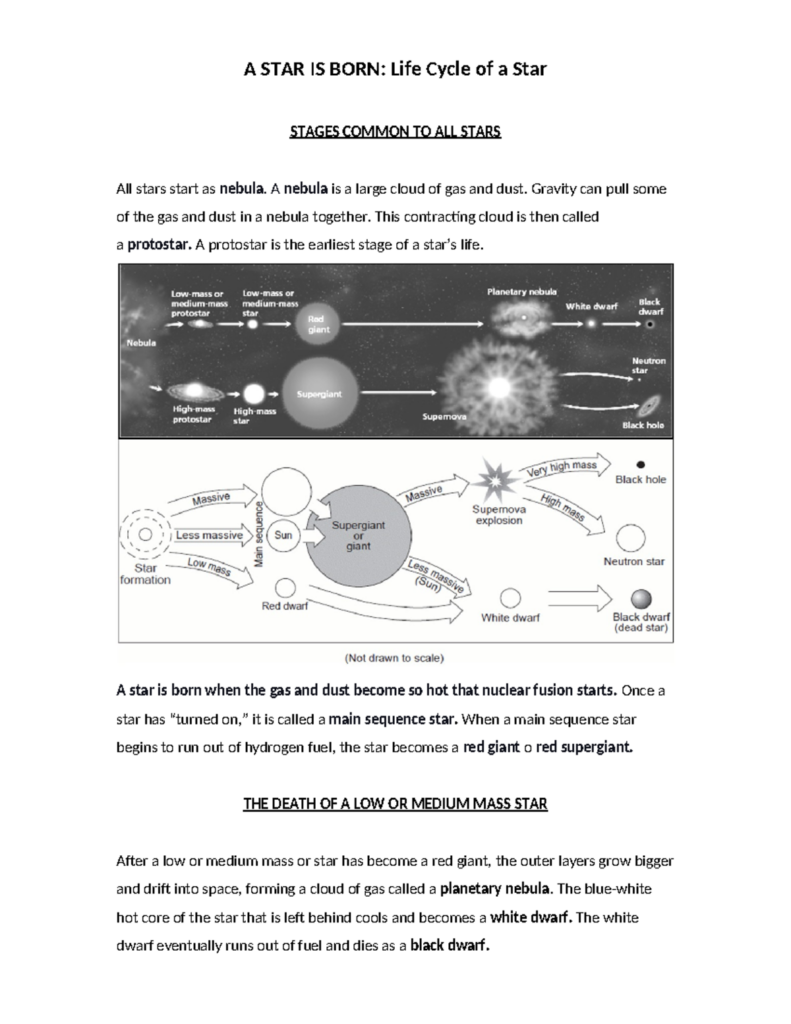
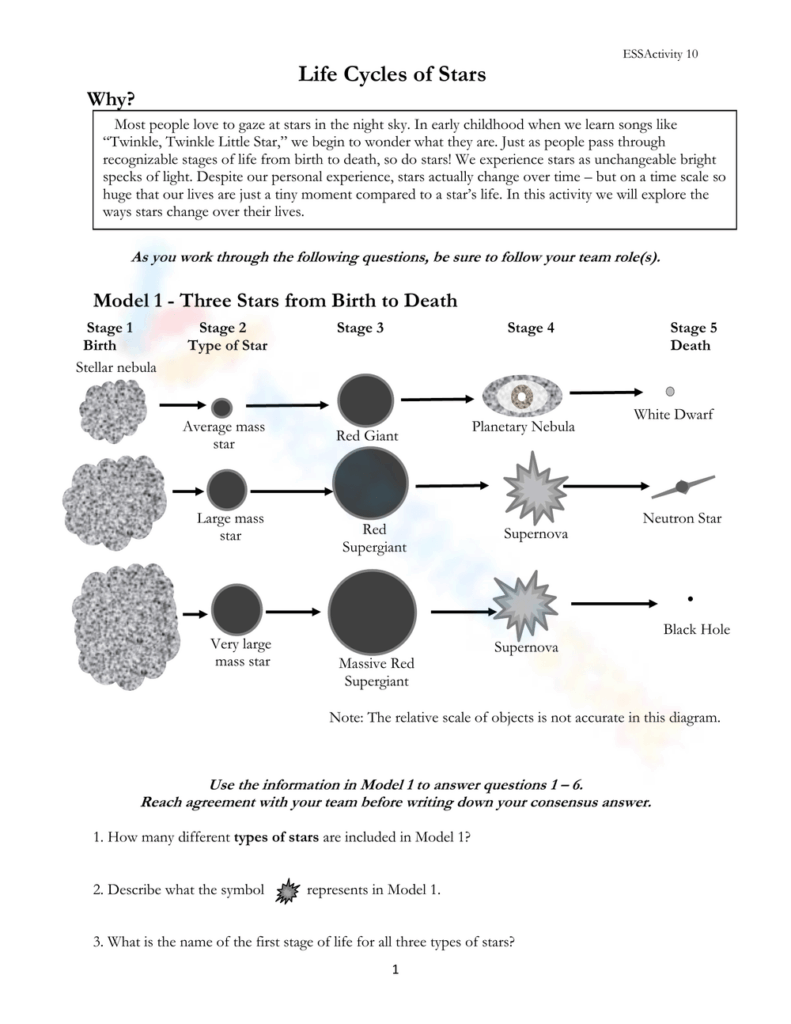
A strong worksheet usually includes the main stages taught at school level: stellar nebula, protostar, main sequence, and red giant or supergiant. After that, students learn that the final stage depends on the star’s size. Smaller stars may become white dwarfs, while larger stars can end as neutron stars or black holes. On a worksheet, these stages are often shown as a flow of boxes, arrows, or picture cards for easy sequencing.
Kid-Friendly Layout
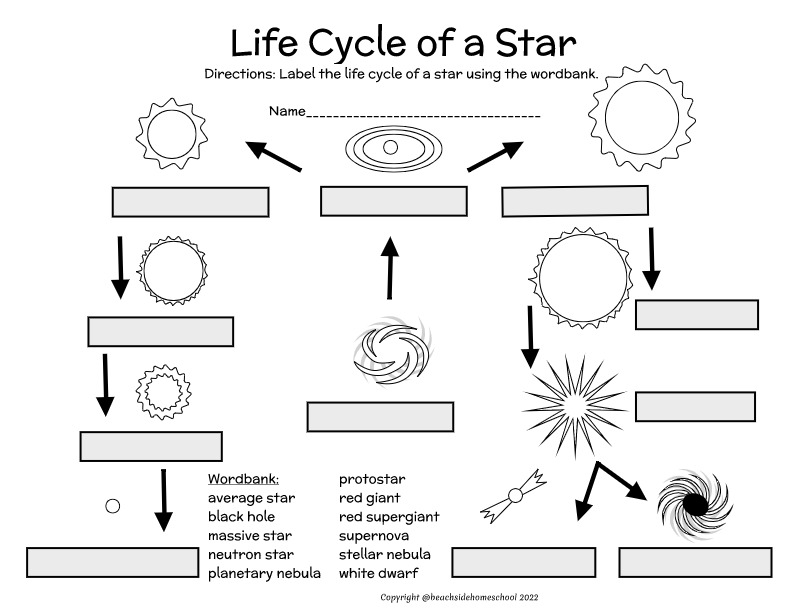
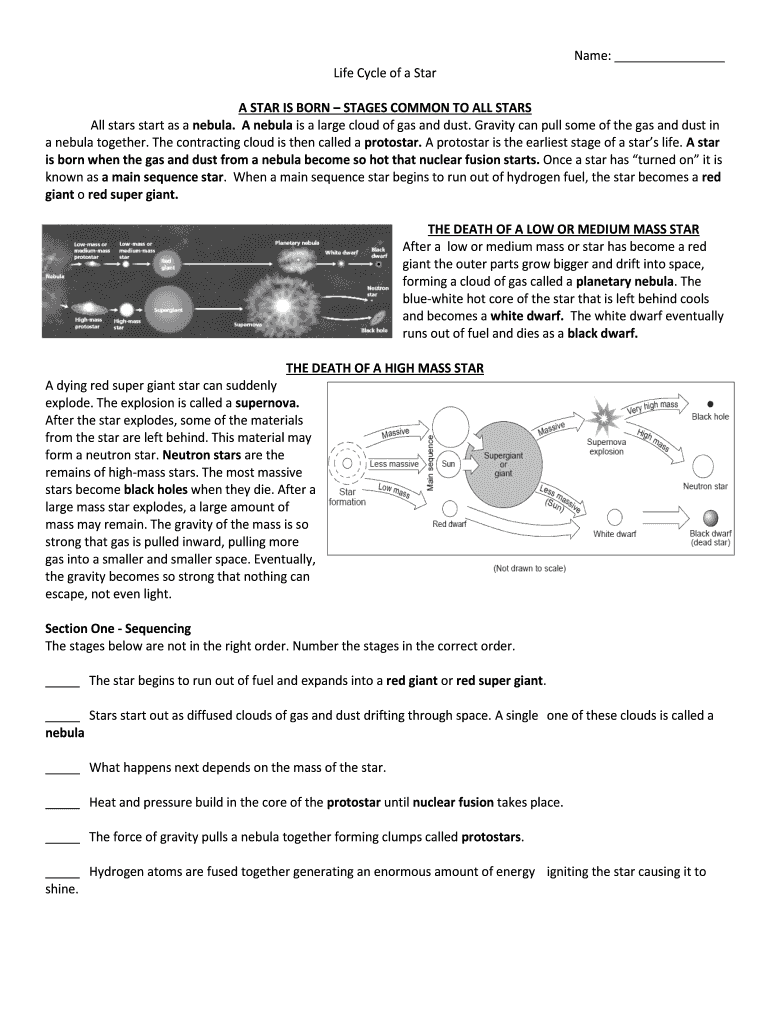
For younger learners, the worksheet should use large text, simple labels, and clear images that show each stage without too much detail. A good layout might include a word bank, a cut-and-paste ordering task, or matching pictures to names. Some worksheets also use color cues, such as warm colors for growing stars and darker shades for end stages, to help children recognize patterns while reading the diagram.
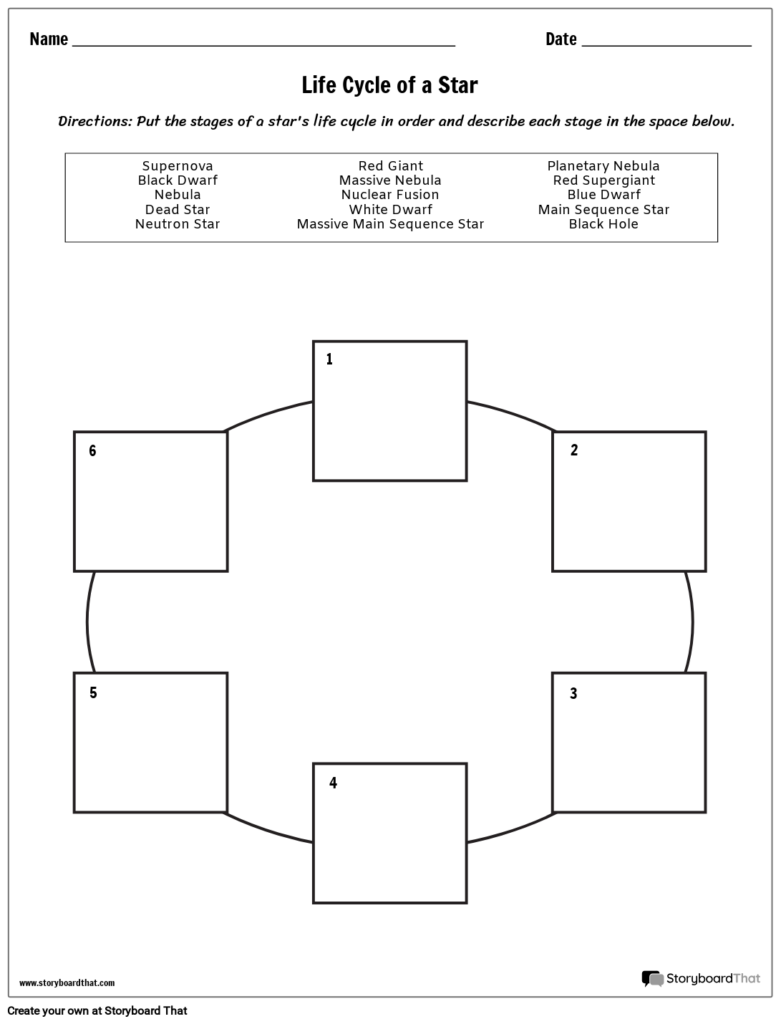
The most useful life cycle of a star worksheet gives students enough support to practice without feeling overwhelmed. It should help them label, sequence, or match the stages using the standard classroom terms their teacher uses. When the wording stays simple and the visuals are easy to follow, students can better understand that different stars follow different paths after the red giant or supergiant stage, which makes the worksheet both clear and effective.